
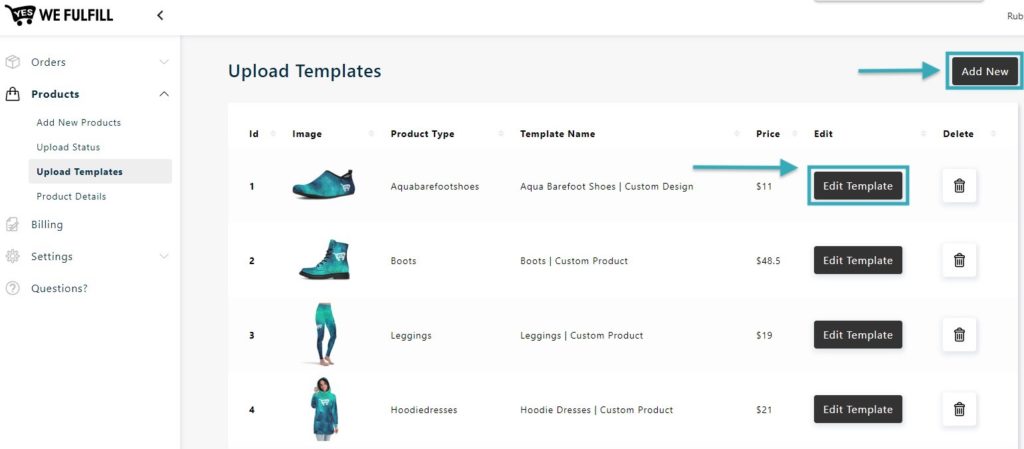
Upload Templates
Under the Products section, go to the Upload Templates menu.
To add a new template, click the Add New button at the top right corner of the page.
To edit a template, click the Edit Template button beside the respective template.
Add/Edit Product Template
Then, select the Product Category, and the Product Name and add any specific information in the Template Name to easily identify the change you made to your template.
Text added in the Template Name section will be added after the Product Name.
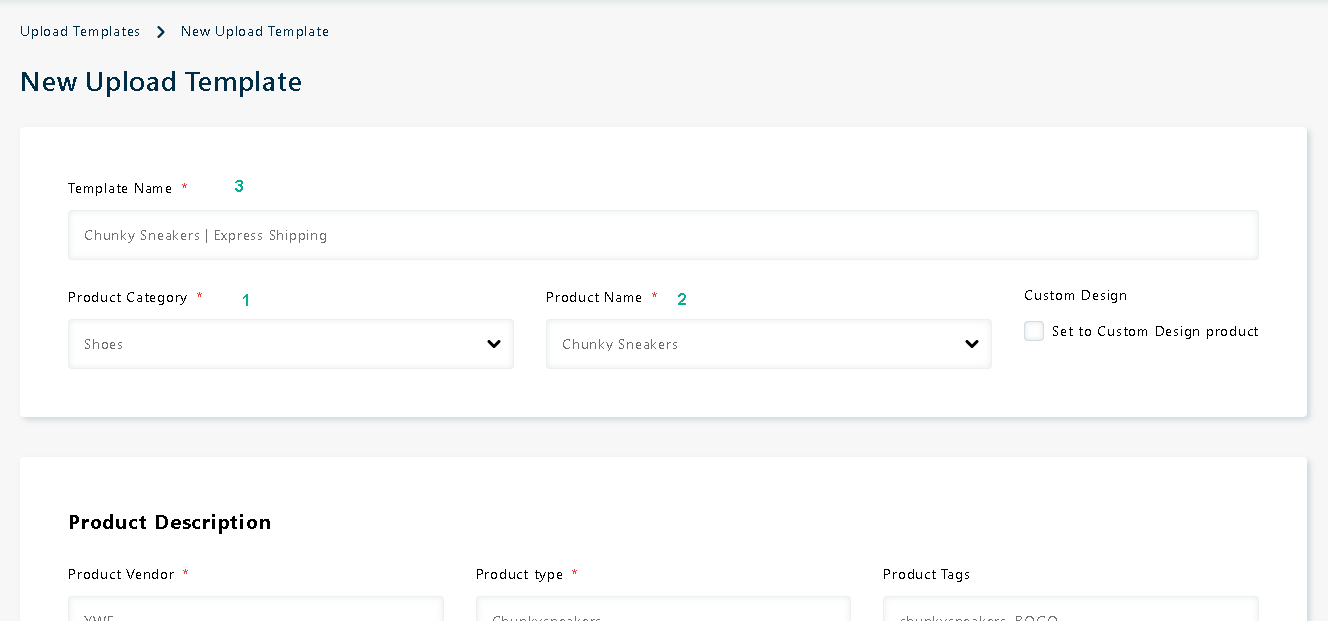
All fields are filled with default information we’ve set up in the App, but you can edit any field that is not grayed.
Fields with a red asterisk are mandatory.
Check the Set to Custom Design Product box if you wish to create a custom design template. Products uploaded as Custom Design will be imported in the Custom Design status when they are purchased by your customers and you’ll need to upload your customer’s custom designs to have them processed in production.
For more information about Custom Design products and orders, please read the Custom Design Article
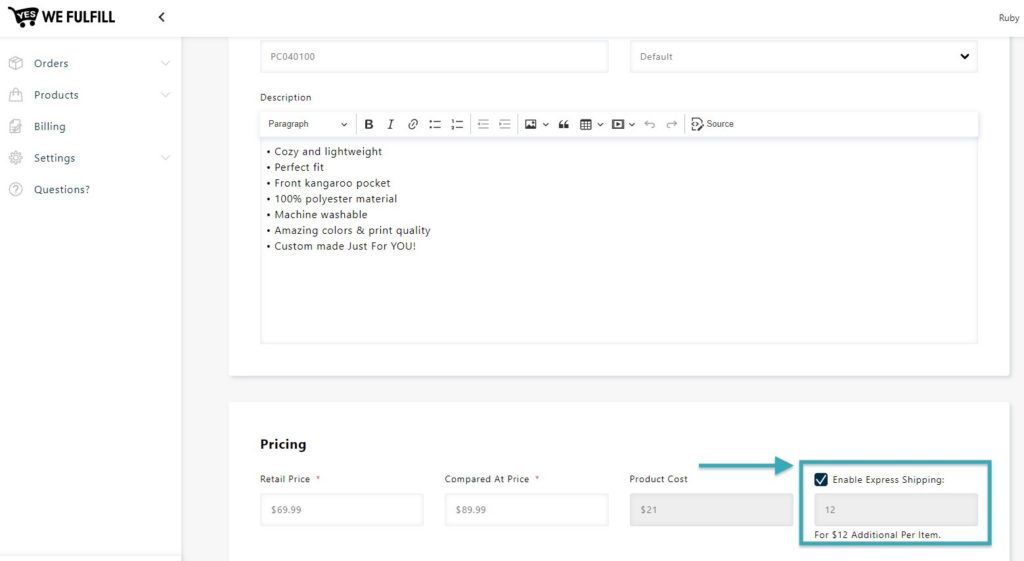
In the Pricing section, if you click the Enable Express Shipping box, all products uploaded using the template will be shipped using the Express Shipping Method (unless for some reason the method is not available in the customer’s shipping country).
Additional charges by item will be applied to your invoice.
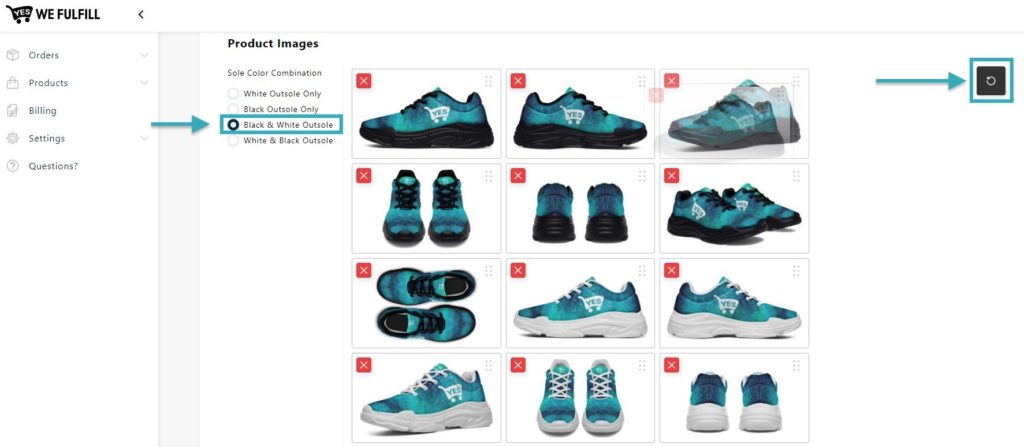
Under the Product Images section, you can delete images, reorder them or choose to use only Black or White Outsoles and even reorder the outsole color that is shown first.
To change the Product Images positions, select the little dots at the right of an image and move them to the desired place.
Check one of the Sole Color Combinations to quickly update the Product Images selection.
If you wish to reset your changes to the default position, click the circle back arrow icon.
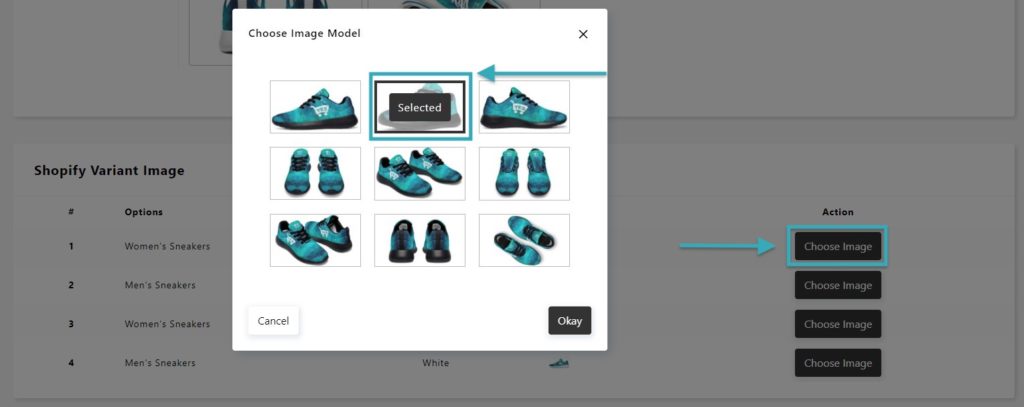
To update the Shopify Variant image, click the Choose Image button and then select the desired image.
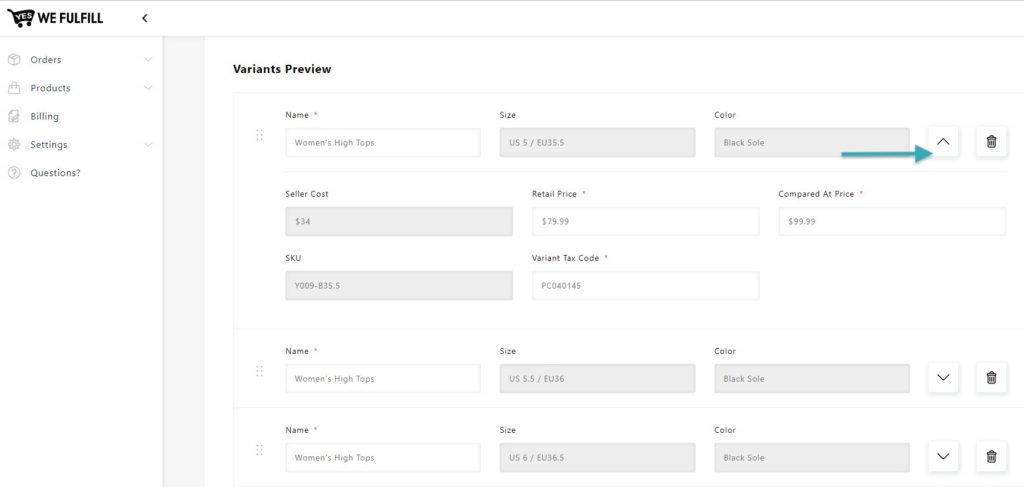
To change the variant’s positions, click on the little dots beside the variant image and drag the box up or down to the desired position.

Click the arrow icon to edit the Retail Price, Compared At Price, or Variant Tax Code of each variant if needed.
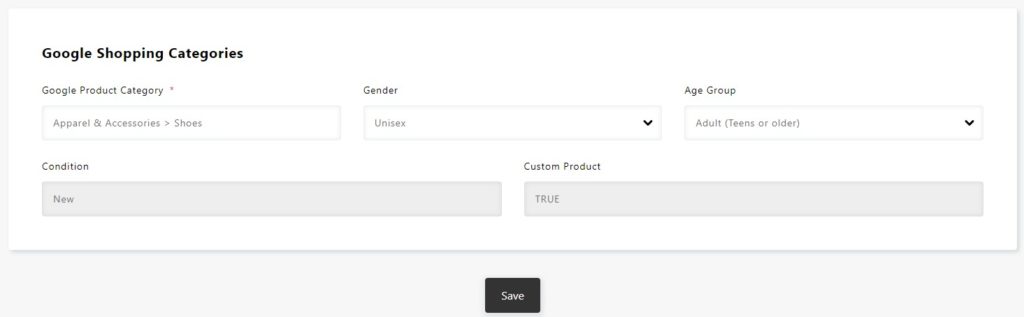
Lastly, you can also change the Google Shopping Category information if needed and click the Save button once all your changes have been completed.
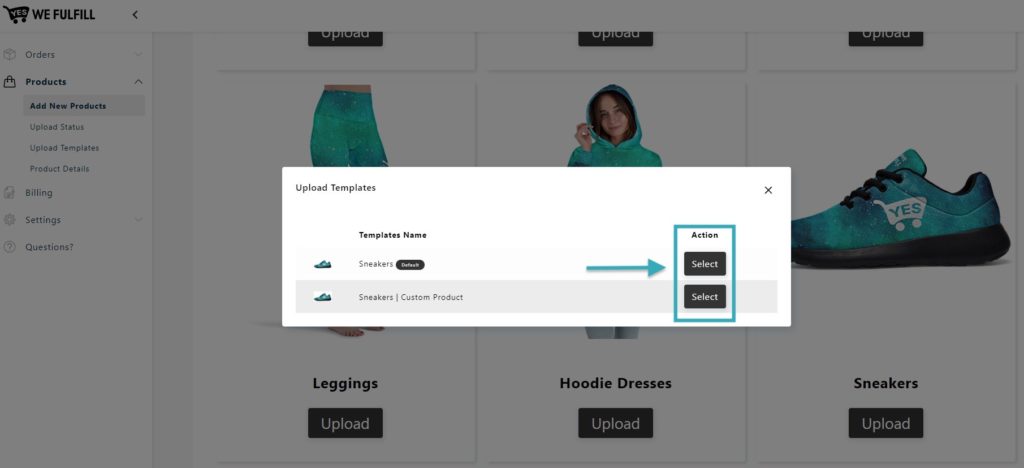
You will now be able to choose the template you have created when you create a new product.
After you click the Upload button below the product type, the Upload Templates pop-up window will appear.
The default product template is the one created by the YWF app.
Still Stuck? How can we help?