
Create Custom Design Products
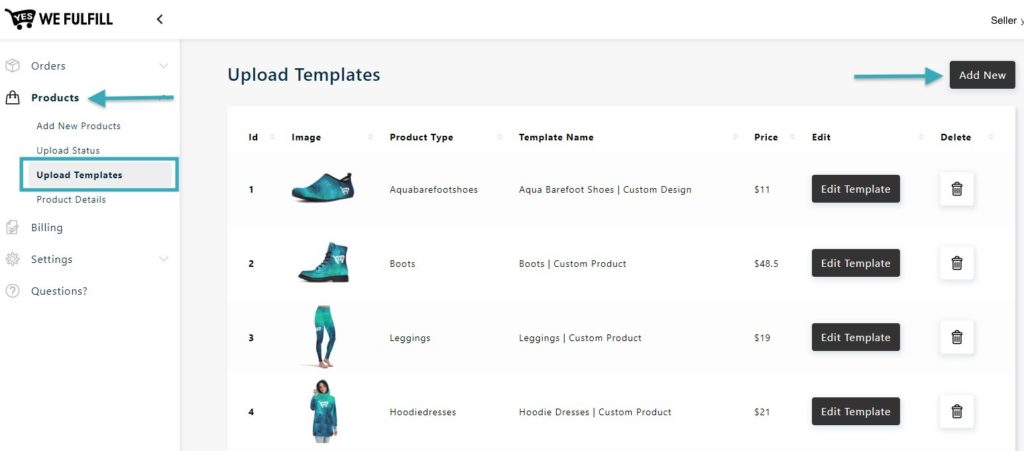
To create a Custom Design product, go to the Products Section, select the Upload Templates menu and click the Add New button at the top right of the page.
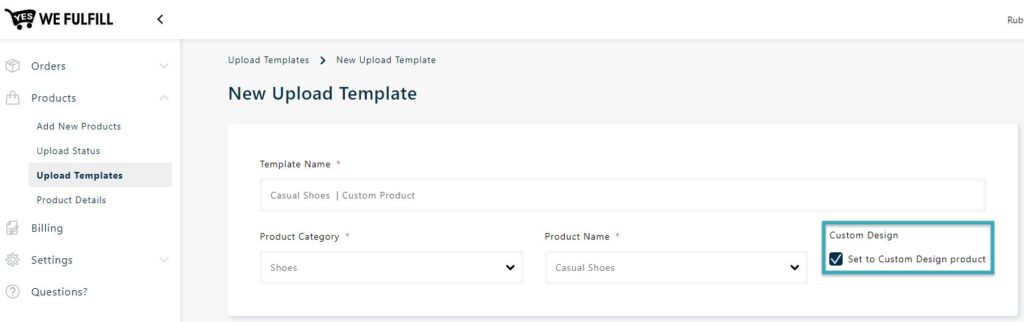
After selecting the Product Category and the Product Name, make sure to rename the Template Name with “Custom” or any text that will easily let you identify that the template is set to create Custom Design products.
Then, check the Set to Custom Design Product box, make any modifications on the template if needed and save the template.
Your template is now saved and will be available in the Add New Products section when you select a product to upload.
Learn more on how to upload products.
Custom Design Status
Then, orders containing custom design products will be imported in the App in the Custom Design status, instead of being imported in the New status. This is to let you upload the Custom Design files before sending them to production.
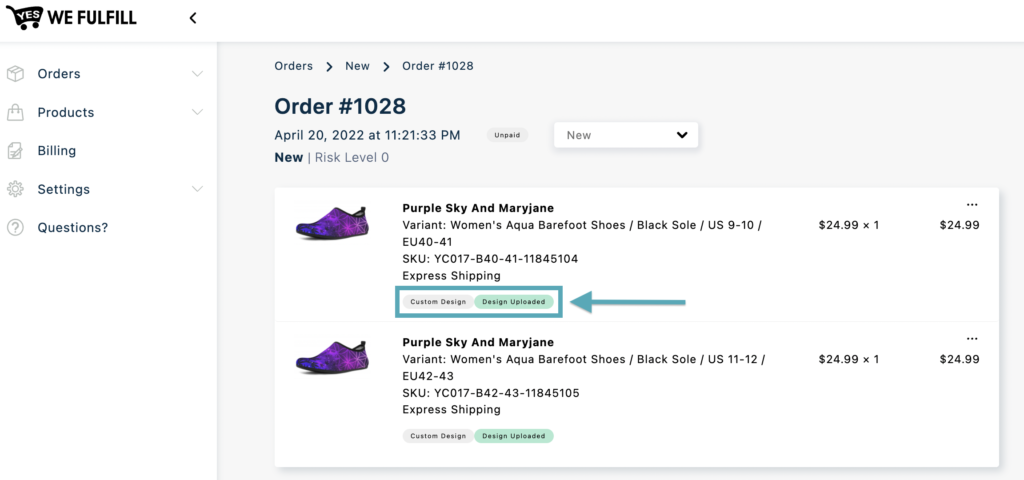
Custom design products have a grey “Custom Design” badge that can be found below the Product Line Item inside the order.
All custom design products start with the letter “YC”.
Example: YC014-B36-IYV40201
A green badge “Design Uploaded” will show once the Custom Design File of the custom design product is uploaded.
Custom Design Menu
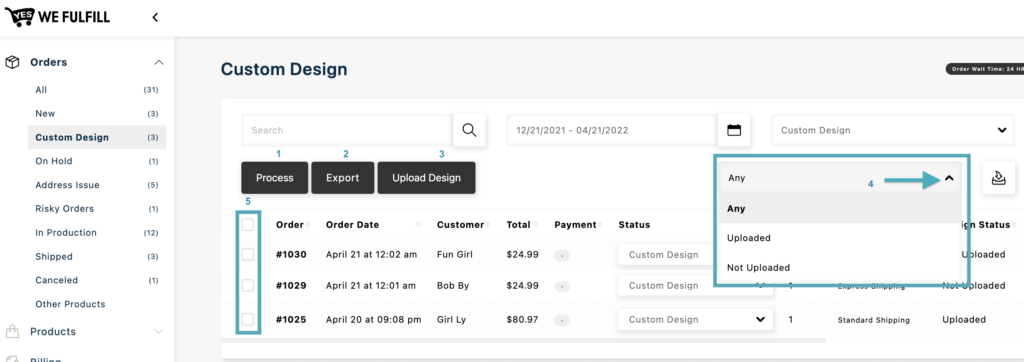
Buttons:
- Process: To process orders with uploaded Custom Design Files. The App will prevent you from processing them if the Custom Design Files of all items have not yet been uploaded. A warning message will let you know that your files are missing.
- Export: To generate a CSV list of orders with all the “Not Uploaded” Custom Design Files.
The CSV file will show a column with:
- The Custom Design – File Name To Upload: It must match with the file name you upload otherwise the APP will not be able to find a match and will not allow you to upload your file
- The Custom Field Key 1, 2, or 3: Our App presently allows up to 3 different Custom Field Keys
- The Custom Field Value1, 2, or 3: Image link or Text sent from your store. Our App presently allows up to 3 different Custom Field Values
- Upload Design– Custom Design uploaded box where you can drag and drop your Custom Design Files.
Additional fields available in this specific status menu:
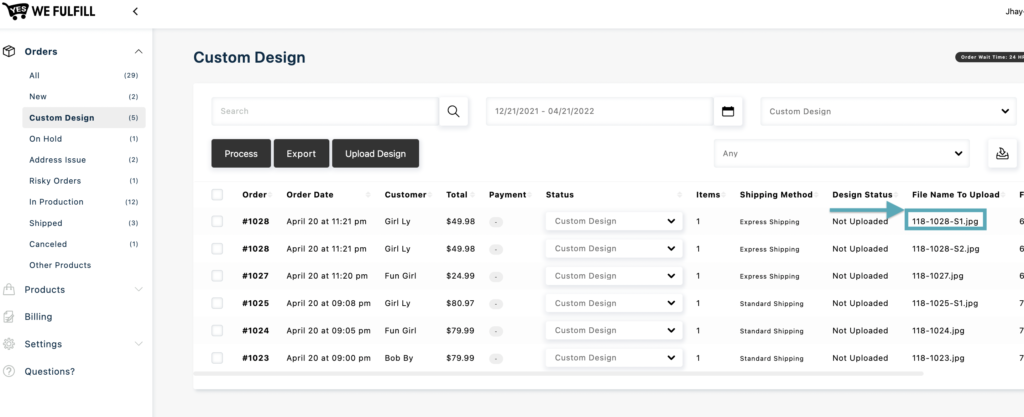
- Design Status – Let’s you identify if the Custom Design File has been uploaded already “Uploaded” or still needs to be uploaded “Not Uploaded”. You can also Filter the status using the dropdown just above the field column.
- Checkbox – Will allow you to select specific orders to export their data, upload the Custom Design Files or process the orders once the Custom Design Files are uploaded.
Orders with at least one Custom Design item will be automatically imported into the Custom Design status unless it is considered a Risky Order. Once you upload all the Custom Design Files in an order, it can either be sent to New status if it has not reached the min Order Wait Time or sent to Production status once the order reaches the min Order Wait Time.
This is the only status menu where you will see 1 row by item within an order instead of 1 row for the whole order. This is to let you see which Custom Design Files are uploaded or not when there are multiple Custom Design items within the same order.
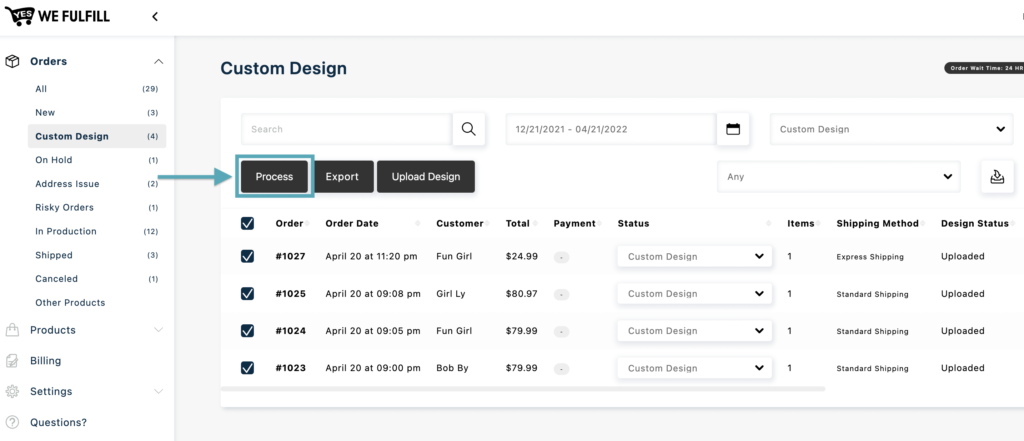
Process Custom Design Orders
Custom Design orders are only allowed to be processed once all Custom Designs Files of the selected orders are uploaded.
To select Custom Design orders, click the checkbox beside the Custom Design order numbers and click the Process button.
Export List of Order
In the Custom Design status menu, click the Export button and the App will generate a csv file of all orders with Design Status “Not Uploaded”.
Information shown in the CSV are the Order #, Order Date, Custom Name, Total, Payment, Order Status, Shipping Method, Design Status, Custom Design File Name To Upload, and the additional columns with the Custom Field Key and Custom Field Value coming from your store.
The Custom Design File Name structure starts with the Seller Code followed by the order #, the Item #, and the Custom Design Field Key of the custom design separated by (-) dash symbols. Sample: IYV-1454.jpg.
The filename must have the custom data key i.e. Sellercode-OrderNo-SrNo-Key1-Key2-Key3.jpg
Sample: IYV-1451-S2-mypetname.jpg

Upload Custom Design Files
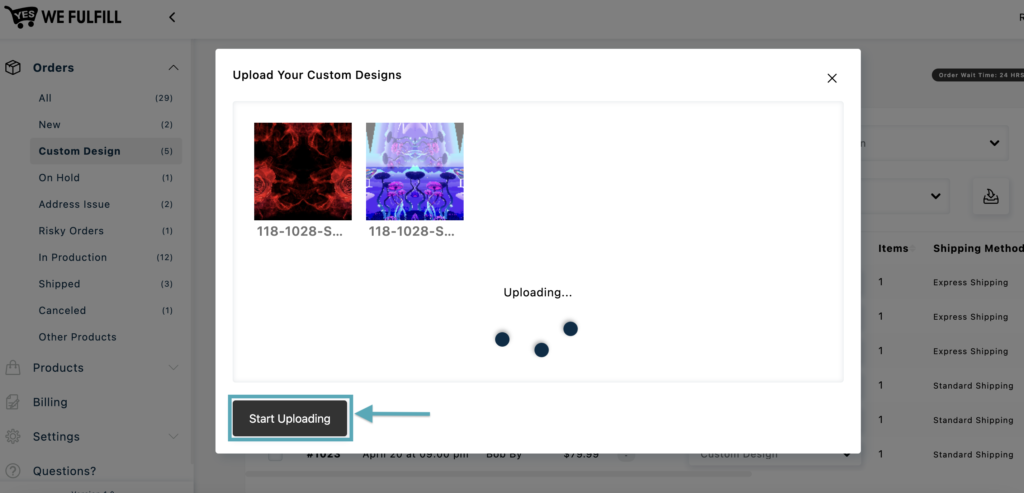
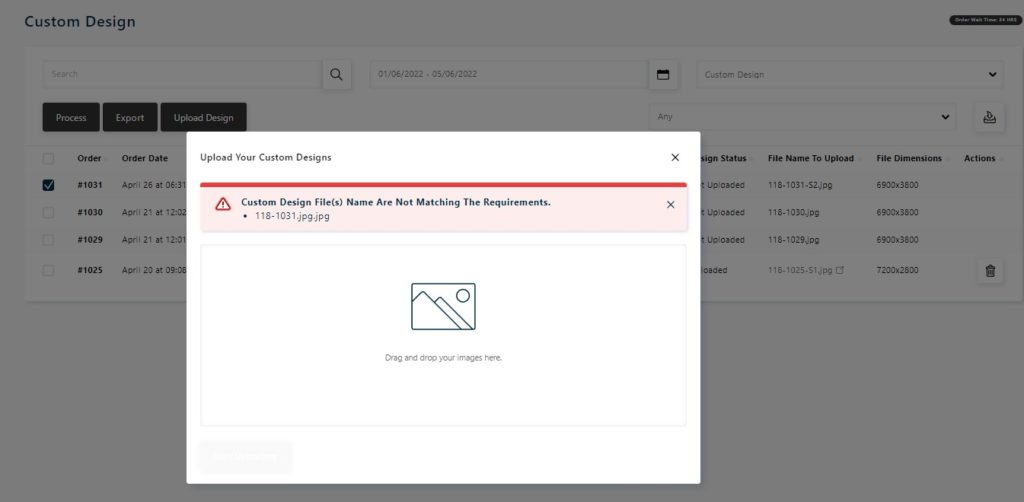
Click on the Upload Design button, a pop-up box will appear prompting you to “Upload Your Custom Designs”.
You can then drag and drop up to 100 images at a time. Once all images are showing in the pop-up, click on the Start Uploading button to start the upload process.
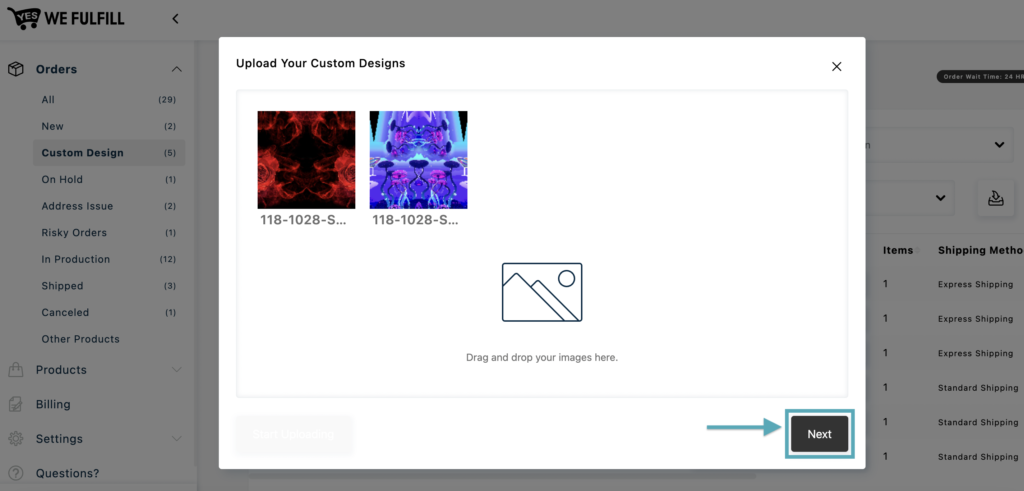
Once all designs are uploaded, the Next button will appear, so you can click on it to proceed to the next steps.
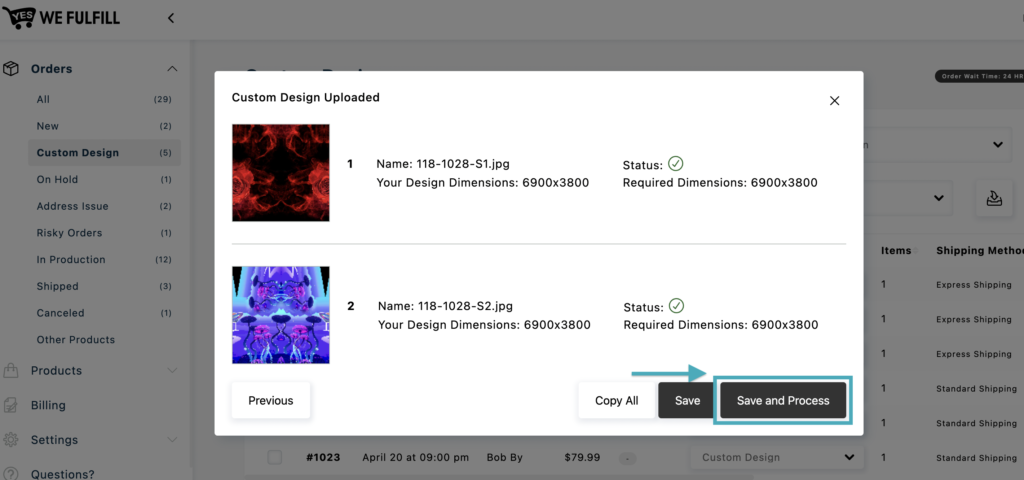
The Custom Design Uploaded pop-up will appear and advise you if your Custom Design File dimensions don’t meet the design template requirements.
Status will either show a green check if the requirements are met or a red x if they are not.
Copy All Button: Allows you to copy all the design data and paste it inside a notepad or to a clipboard.
Save:: Allows you to save uploaded designs and go back to the Custom Design orders list menu without processing the designs.
Save and Process: Will process the orders with the accepted design dimensions.
After saving the uploaded Custom Design you are automatically redirected to the Custom Design orders menu.
Once a Custom Design is uploaded you can view the image by clicking on the order Custom Design File Name.
File Name and Dimensions Errors
If an uploaded design’s name is not matching the required File Name To Upload, a message will show at the top of the pop-up window with the design’s name having an error.
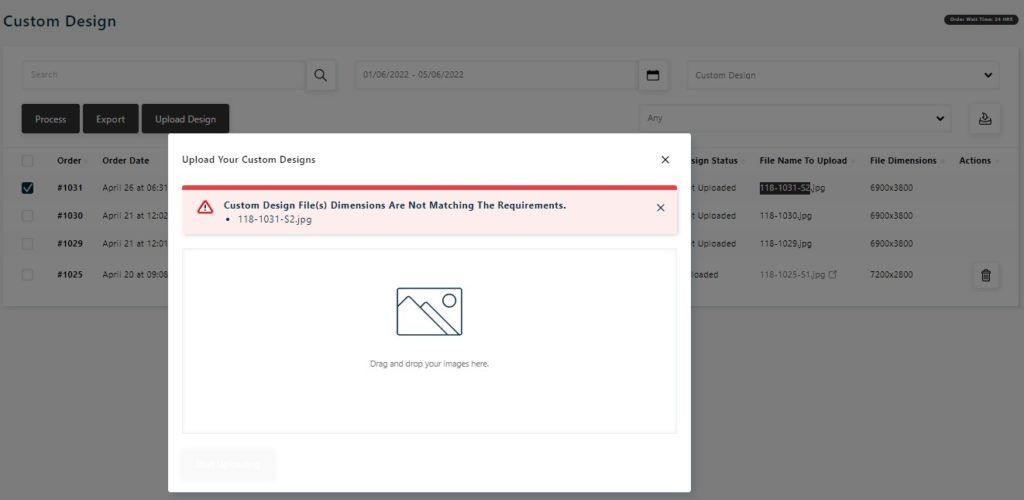
If an uploaded design’s dimensions are not matching the required File Dimensions, a message will show at the top of the pop-up window with the design’s name having an error.
If the uploaded design’s name and dimensions are both not matching the requirements, a message will show at the top of the pop-up window with the design’s name and dimensions having an error.

Custom Design Order Flow
Once all the Custom Design Files of an order are uploaded in the App, you will need to select the order and click on the Process button, or manually change the order status to either New or In Production if it has reached the minimum Order Wait Time of 2 hours.

A Custom Design order could also be identified as a risky order (an order that reaches the Risk Score set in your General Settings). If this happens, the order will first go in the Risky Orders status to be resolved before you can change it to the Custom Designs status and upload your Custom Design file.
If a Custom Design Order has an address issue, it will first go to the Address issue status after its Custom Design File is uploaded to be resolved before you can change it to the New or In Production status.
Still Stuck? How can we help?